Overcome Your Gut + Digestive Issues With Ancestral Nutrition
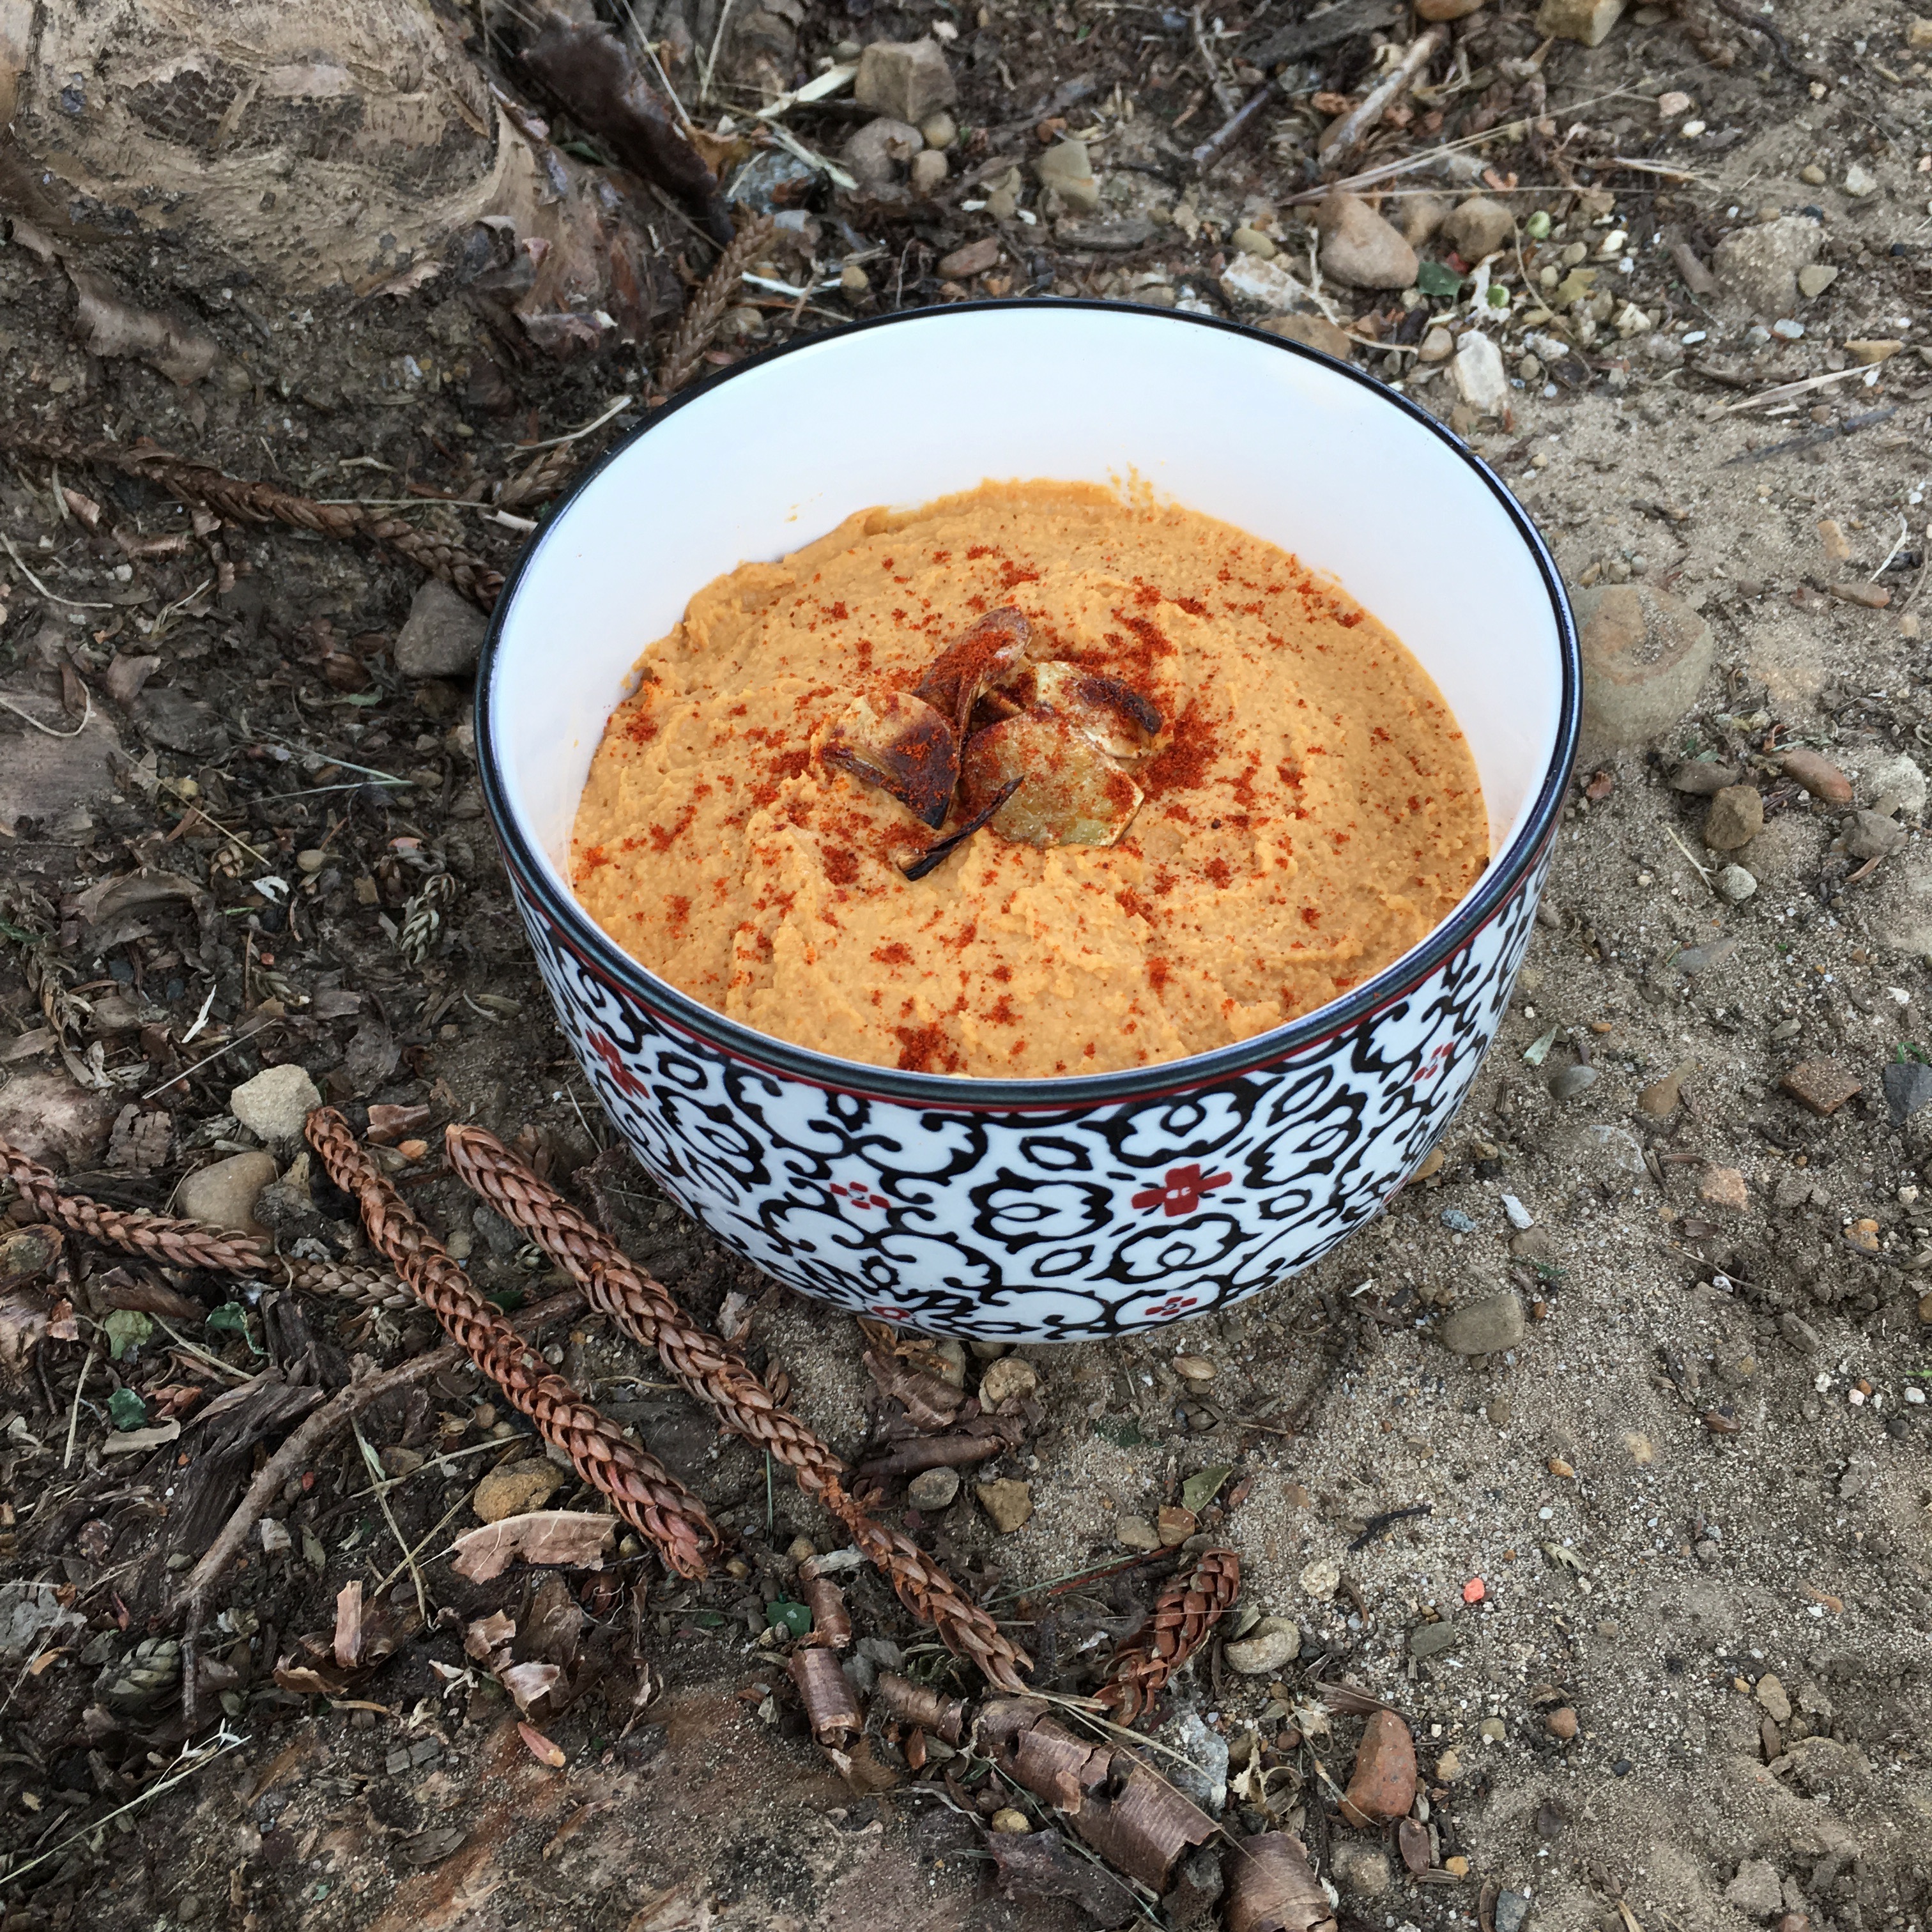
Roasted Garlic Paprika Hummus

This is a very old recipe of mine. I’ve been making it for about 4 years now. During high school, I had a big hummus phase. I was making hummus very regularly, and ended up coming up with several hummus recipes. The rest of my hummus recipes are already posted on this site, my Roasted Red Pepper Hummus, Artichoke Hummus, Black Bean Hummus, and Green and Kalamata Olive Hummus. So it seems only natural that I should post this one as well.
The idea for this recipe came before I started making hummus on a regular basis. One afternoon I was hungry for a snack so I went over to the kitchen to find something to eat. I found some hummus and crackers which I thought sounded good so I grabbed them. As I started to eat, I found the hummus to be incredibly bland so I ventured back into the kitchen to find something to spice it up. I opened the spice cabinet and gazed over my options. Paprika! That sounds good. I added some paprika and was amazed at how much better the hummus was. What was originally bland and uninteresting became flavorful and exciting.

The next time I found myself making hummus I decided to stick with the paprika that I loved so much. I also roasted up some garlic and put a descent amount of lemon juice in there. The result was delicious. A creamy hummus with well balanced flavors. A little sour from the lemon, spice from the cayenne, bitter from the tahini, sweet from the paprika, and savory from the garlic. This quickly became one of my favorite afternoon snacks.
A few notes about the recipe. First of all, I give you the option to use dried beans or canned beans. I have used both many times. I opt for canned when I am short on time. When I have a little more time, I like to make it with the dried beans. I use a pressure cooker to do this so I give instructions using a pressure cooker. If you don’t have a pressure cooker but still want to use dry beans, you totally can. Since I am not yet familiar enough with cooking dry beans without a pressure cooker, I recommend you check out Inspired Tastes guide on how to cooking dried chickpeas. It is very thorough and explains things well.

Secondly, the quality and type of paprika you use will strongly impact the favor of your hummus. I have used many different types. You can use sweet paprika, Hungarian paprika, smoked paprika, or some other variation. Just be sure it’s good quality. As a general rule of thumb, the quality of the food always influences the overall taste. Personally I found the paprika to make an exceptional difference in this recipe so I thought it was worth mentioning.
With all that being said, this recipe makes for a great snack when served with crackers, veggies, pita, chips, olives, or whatever else you enjoy dipping in it. I hope you and your family enjoy this recipe as much as I do!
With love from my kitchen to yours,
Kayley
Roasted Garlic Paprika Hummus
Cooking beans from scratch will add about 1 hr and 40 minutes to your total time. However that is cooking and soaking time so you can do something else during that time.
If using a pressure cooker, place dry chickpea in pressure cooker, rinse and drain. Add water, bring to a boil, turn off heat, and let soak for 1 hour. Then secure lid and bring to a steam over high heat. Once it begins steaming, reduce heat to medium and cook for 30 minutes. After that, depressurize your pressure cooker. Drain the water reserving 3 tablespoons of the water for the hummus.
If using canned beans, skip the first step, open and drain your cans, reserving 3 tablespoons of the water for the hummus.
Peal and thinly slice garlic. Heat 1/2 tablespoon of oil in a pan over medium heat. Once hot, at the garlic to the pan and sauté till it browns.
Combine all ingredients in a blender and blend till smooth. Use a tamper while blending to move things around more efficiently. Once fully blended; transfer to a tupperware; store in the fridge; serve with crackers, pita or veggies; and enjoy! Homemade hummus is said to last for about a week, however mine usually lasts a week and a half.
Ingredients
Directions
If using a pressure cooker, place dry chickpea in pressure cooker, rinse and drain. Add water, bring to a boil, turn off heat, and let soak for 1 hour. Then secure lid and bring to a steam over high heat. Once it begins steaming, reduce heat to medium and cook for 30 minutes. After that, depressurize your pressure cooker. Drain the water reserving 3 tablespoons of the water for the hummus.
If using canned beans, skip the first step, open and drain your cans, reserving 3 tablespoons of the water for the hummus.
Peal and thinly slice garlic. Heat 1/2 tablespoon of oil in a pan over medium heat. Once hot, at the garlic to the pan and sauté till it browns.
Combine all ingredients in a blender and blend till smooth. Use a tamper while blending to move things around more efficiently. Once fully blended; transfer to a tupperware; store in the fridge; serve with crackers, pita or veggies; and enjoy! Homemade hummus is said to last for about a week, however mine usually lasts a week and a half.
Notes
Nutrition:
| Ingredients | Calories | Fat | Carbs | Protein |
| 2 cans garbanzo beans | 934 | 14.8g | 156g | 50g |
| 1 tbsp and 2 tsp olive oil | 200.4 | 39.1g | 0g | 0g |
| 1/2 cup tahini | 880 | 80g | 16g | 24g |
| Total (4 cups) | 2,014.4 | 133.9g | 172g | 74g |
| 1 serving (1/3 cup) | 167.9 | 11.2g | 14.3g | 6.2g |
(1, 2)
Notes:
- Nutrition is based on the products I use. I provide a nutrition table so that you can quickly check to see if your food products match or so that you can easily calculate the nutrition for any changes you want to make to the recipe. I think this helps if you have very specific diet goals and/or fitness and/or health goals. I also wanted you to be able to see exactly where I get the numbers for my nutrition facts so that you can see that they are reliable and learn more about macro breakdowns of food.
- I didn’t calculate 1 tsp of the oil because some gets stuck to the pan when you are frying the garlic.
- I calculated nutrition for canned chickpeas, however be mindful that the nutrition can change for 1 cup of dried chickpeas.
Works Cited
1. Nutritionix. Gladson. https://www.nutritionix.com/ Accessed 21 January 2019.
2. “Nutrition Label of olive oil.” Field Day, Providence, RI, 2019

