Overcome Your Gut + Digestive Issues With Ancestral Nutrition
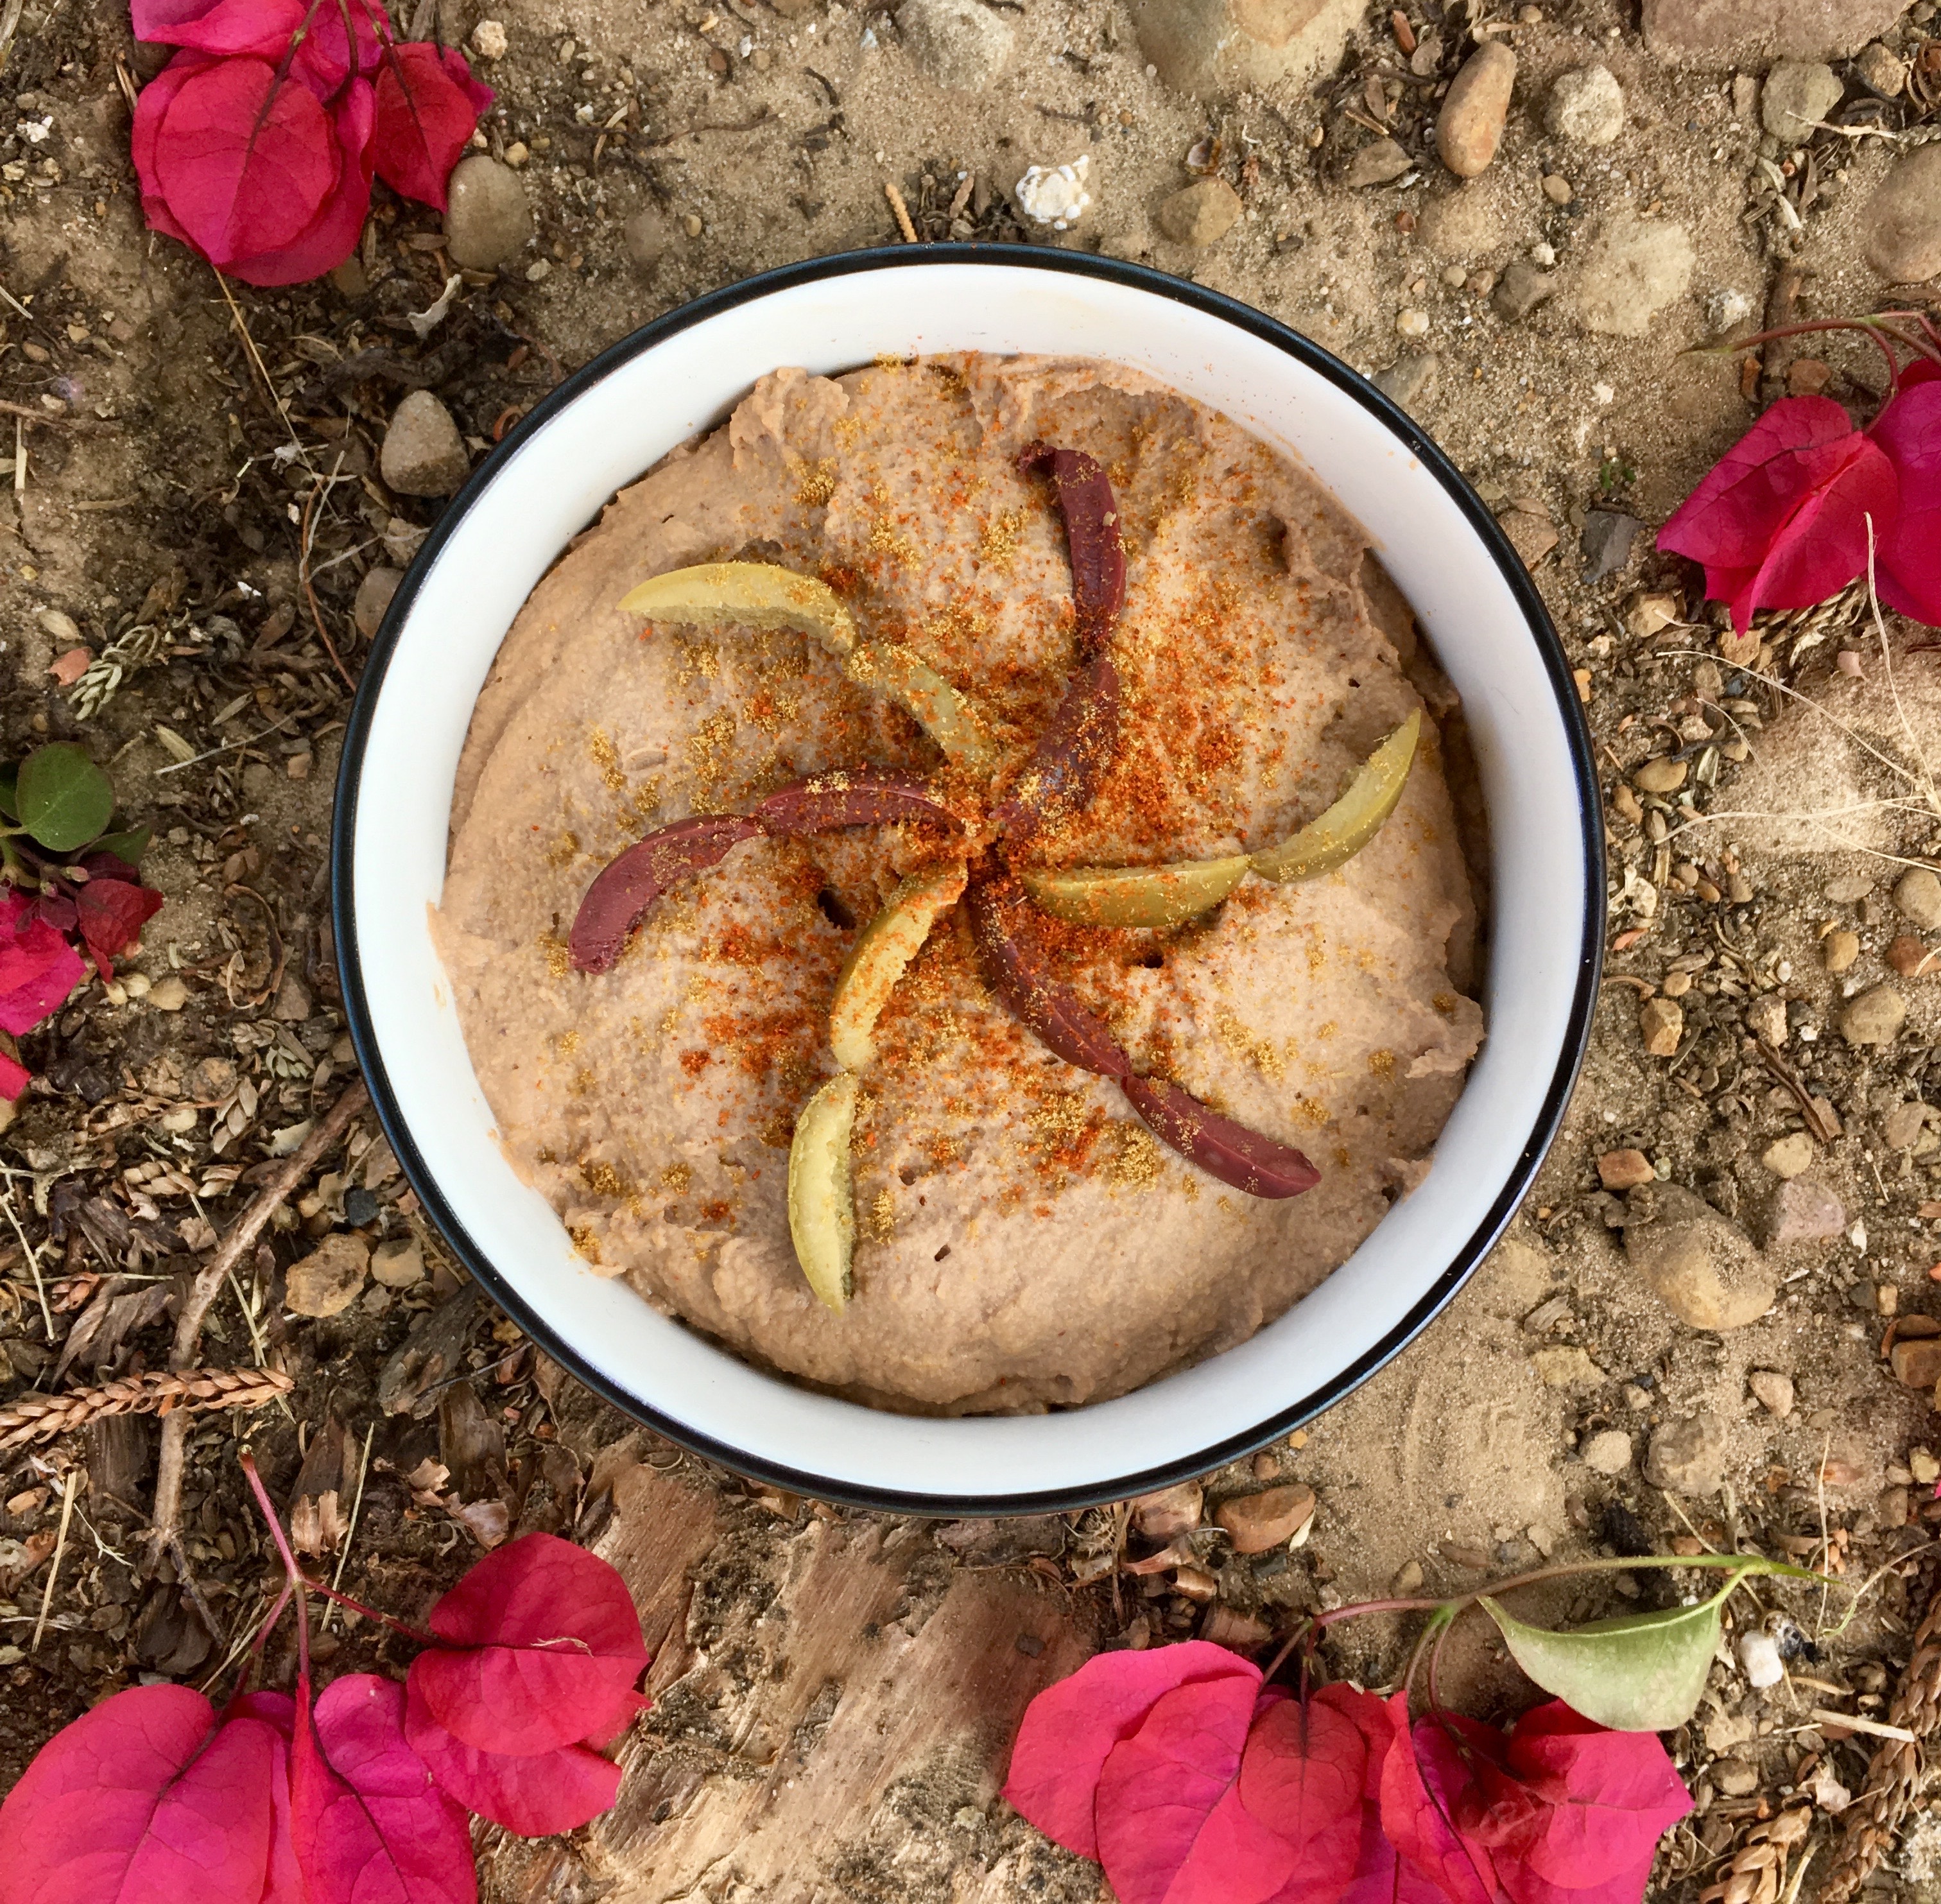
Green and Kalamata Olive Hummus

Hummus is a great snack. I have been making my own hummus for about 4 years now and I love it! Now you might be wondering why you should bother making your own hummus when you can buy it at the store. Well in case you are, I will give you four reasons to.
4 Reasons to Make Your Own Hummus:
1) It’s actually really convenient- Initially making hummus might sound like a big task but it really doesn’t have to be. If you are using canned beans, one batch of hummus comes together in about 12 minutes. That’s pretty quick! Also most of the ingredients are staples that you probably already have. Things like garbanzo beans, tahini, ground cumin, olives, lemon, garlic, and extra virgin olive oil. These ingredients also tend to last pretty long. (Note the convenience factor goes away if you choose to cook with dried beans).
2) For Taste and Higher Nutritional Content- When you make your own food, you have control over the quality and freshness of your ingredients. The higher quality and fresher the ingredients you use the better it will taste and the more nutrients it will contain.
3) To save money- The hummuses I see at the store or farmers market, usually cost about $3-6 for 1 cup of hummus ($3 for the lower quality ones and $6 for the high quality organic local ones). When you make your own hummus with high quality ingredients, I calculated the costs to be less than $2.50 per 1 cup of hummus. This price difference makes sense because when you make hummus, you pay for the ingredients. When you buy hummus, you pay for the ingredients and for the packaging, marketing, salary of the workers, the bump in price for the grocery store to make a profit, and other business expenses.
4) It’s Fun- Cooking is really fun! It’s like art you can eat. You can be creative, develop a skill, and enjoy yourself when you cook! I find it to be meditative and de-stressing as well.

About this recipe: Dry vs. Canned Beans
One thing I want to touch on about this recipe is the option to make it with dry beans or canned beans. I have made it with both several times and both have their benefits. So lets look at the difference.
| Dry Beans | Canned Beans |
| More nutritious (you can sprout them first for even more nutritional benefits) | Less nutritious (Don’t unlock all the nutrients you get from soaking them and are not as fresh) |
| Easier to digest / make you less gassy | A little harder digest / can make you gassy |
| More cost effective | Slightly more expensive |
| Less waste | The can is waste |
| Can take 3-8 hours to cook and 1-24 hours to soak | Convenient (already cooked) |
| You have plan ahead to use them | No planning ahead required |
| More varieties of beans available | Less varieties of beans available |
| Taste better | Still good but not as tasty as dry beans |
(1)
Basically if you’re short on time and want something easy and convenient, I would suggest canned beans. However, if you have the time, are going to be around the house, and are willing to put in a little more effort; I would suggest trying dried beans. Dry beans can be a little frustrating at first since they can take hours, so make sure you are up for it before you choose them.
Note there are many different ways to make dry beans and you don’t need a pressure cooker. I give instructions for using a pressure cooker because it is my preferred method. For more cooking options check out this article by Inspired Taste). They did an excellent job explaining various options for cooking dried beans.
With all that being said, lets get to the recipe! Todays recipe is a Green and Kalamata Olive Hummus Recipe! This hummus is great with veggies (like snap peas and carrots), crackers, pita bread or chips, or really whatever you want to dip in it. I hope you enjoy the recipe and I hope it brings happiness and health to you and your family.
With love from my kitchen to yours,
Kayley

Green and Kalamata Olive Hummus
Cooking beans from scratch with a pressure cooker will add about 1 hr and 40 minutes to your total time. However that is cooking and soaking time so you can do something else during that time. If you cook dried beans without a pressure cooker, it will add 1-24 hrs of soaking time and 3-8 hours of cooking time.
If using dry beans, place beans in a pressure cooker, rinse and drain. Then add 7 cups of water, bring to a boil, then turn off heat, and let sit for at least an hour. Then secure the lid and bring to a steam over high heat. Once steaming, reduce heat to medium and cook for about 30 mins. Then depressurize and drain, reserving 1/4 cup of the water for later. (Note there are many different ways to make dry beans and you don't need a pressure cooker. This is just my preferred method. For more cooking options check out the "About this recipe: Dry vs. Canned Beans" section of the post above).
If using canned beans, open and drain reserving 1/4 cup of the water for later.
Heat 1 tbsp of the oil in a small pan over medium-high heat. Once the pan and oil are hot, add garlic and sauté for a few minutes, stirring occasionally, till golden brown.
Combine the garbanzo beans (dried and cooked or canned), sautéed garlic with excess oil from the pan, the remaining 1 tbsp of oil, tahini, lemon juice, cumin, salt, reserved chick pea water, green olives, and kalamata olives in a blender or food processor and blend till smooth. If using a blender, use the tamper to help blend. Once smooth transfer to a tuperwear (preferably glass) and store in the fridge for up to two weeks.
Serve with crackers, pita, and/or veggies and enjoy!
Ingredients
Directions
If using dry beans, place beans in a pressure cooker, rinse and drain. Then add 7 cups of water, bring to a boil, then turn off heat, and let sit for at least an hour. Then secure the lid and bring to a steam over high heat. Once steaming, reduce heat to medium and cook for about 30 mins. Then depressurize and drain, reserving 1/4 cup of the water for later. (Note there are many different ways to make dry beans and you don't need a pressure cooker. This is just my preferred method. For more cooking options check out the "About this recipe: Dry vs. Canned Beans" section of the post above).
If using canned beans, open and drain reserving 1/4 cup of the water for later.
Heat 1 tbsp of the oil in a small pan over medium-high heat. Once the pan and oil are hot, add garlic and sauté for a few minutes, stirring occasionally, till golden brown.
Combine the garbanzo beans (dried and cooked or canned), sautéed garlic with excess oil from the pan, the remaining 1 tbsp of oil, tahini, lemon juice, cumin, salt, reserved chick pea water, green olives, and kalamata olives in a blender or food processor and blend till smooth. If using a blender, use the tamper to help blend. Once smooth transfer to a tuperwear (preferably glass) and store in the fridge for up to two weeks.
Serve with crackers, pita, and/or veggies and enjoy!
Notes
Nutrition: (with dried beans)
| Ingredients | Calories | Fat | Carbs | Protein |
| 1 cup dry garbanzo beans | 756 | 12g | 126g | 41g |
| 2 tbsp olive oil | 238 | 28g | 0g | 0g |
| 1/2 cup tahini | 712 | 64g | 25.6g | 20.8g |
| 3/4 cup green olives (170g) | 246.8 | 26.3g | 6.5g | 1.7g |
| 1/4 cup kalamata olives (32g) | 69.3 | 7.2g | 1.7g | 0.2g |
| Total (2 3/4 cups) (serves 8-11) | 2,022.1 | 138.1g | 190.4g | 72.8 |
| 1 serving (1/3 cup) | 243.6 | 17.3g | 23.8g | 9.1g |
| 1 serving (1/4 cup) | 183.8 | 12.6g | 17.3g | 6.6g |
Nutrition: (with canned beans)
| -1 cup dry garbanzo beans | -756 | -12g | -126g | -41g |
| + 2 cans garbanzo beans | 934 | +14.8g | +156g | +50g |
| Total (2 3/4 cups) (serves 8-11) | 2,200.1 | 140.9g | 220.4g | 81.8g |
| 1 serving (1/3 cup) | 265.1g | 17g | 26.6g | 9.9g |
| 1 serving (1/4 cup) | 200 | 12.8g | 20g | 7.4g |
(2, 3)
Notes:
- Nutrition is based on the products I use. I provide a nutrition table so that you can quickly check to see if your food products match or so that you can easily calculate the nutrition for any changes you want to make to the recipe. I think this helps if you have very specific diet goals and/or fitness and/or health goals. I also wanted you to be able to see exactly where I get the numbers for my nutrition facts so that you can see that they are reliable and learn more about macro breakdowns of food.
- 2 cans of beans have more calories than 1 cup of dried beans so I provided two charts. The reason for the calorie difference is because the measurements are slightly different. 2 cans of beans has more beans than 1cup dried beans. However the difference is not enough to effect the flavors of the recipe. I have made it both ways many times and there is no major difference between the two.
Works Cited
1. Kelly, “Dry Beans Vs. Canned – and the Winner is…” Once A Month Meals. 25 November 2012. https://onceamonthmeals.com/blog/series/get-real/dry-beans-vs-canned-and-the-winner-is/
2. Nutritionix. Gladson. https://www.nutritionix.com/ Accessed 21 January 2019.
3. “Nutrition Label of olive oil.” Field Day, Providence, RI, 2019

